Major Parts Of Aluminum Railings
The major parts of railings are bottom posts, verticals, top railings, and center rails. All the parts are available from a DIY workshop or the parts can be separately purchased and assembled together. It is not difficult to make good-looking railings. The effort required is also not very high.
Tools Needed:
- Circular saw
- Wood worker’s Clamps
- Hand saw
- Rough files 8” long
- Power drill and drill bits of 1/8” 3/16” & ¼” diameter
- 3/8” Hex head driver
- Level
- Tape Measure
- Chalk
- Twine thread
- Hammer
- Scriber for marking aluminum
- Safety goggles
- Hand gloves and
- Mask.
Material required
- Aluminum formed sections 2X4 “and 4×4”
- Wooden Inserts
- 3/8” Hex heads
- Bottom posts
- Aluminum cleats
Selection Of Material
While making aluminum railings please refer to the local building codes and select the material that is allowed in the local codes. Not doing so may cause problems later on. So please be careful. If the design is to be approved by the local builders association or architect, get the approval before starting.
Making Plans
Please prepare design for your aluminum railings. The sketches will help you in firming up the material requirement. This way you will not make any purchases that you do not require. Even if the dealer is ready to take back the unused material, the dealer will not pay for transportation of material back to store and may have some deduction for the returned material.
The method of making straight aluminum railings
Bottom support: The bottom support can be fixed to the wooden flooring at the bottom with help of anchoring bolts.
Preparation for railings: After fixing the bottom support, prepare the complete railing on a level floor and erect it in the bottom support only when it is completely ready
Center rail inserts: Either you can use the clamps made for fixing center rails, or you can use the wooden inserts. For fixing wooden inserts, some skill is required. On two opposite sides of 4×4” post, you can cut a rectangular hole (of inside dimensions of center rail) on opposite side so that a wooden inserts can be fixed and bolted the rail with 3/8” hex bolts.
Verticals and middle railings: The verticals and middle can now be assembled and loosely attached to the bottom support. At this stage, not all the 3/8” screws will be tightened. When the entire railing has been put up, the screws can be tightened up starting up from both ends and meeting at the center.
Inserts for top rail: The wooden inserts for top railings can be fixed up now. It is easier when the complete railing is made. The wooden inserts can extend about half the depth of top rail so that fixing up the top rail is easy. The wooden inserts should be fixed up in the verticals with screws so it does not move
Top rail: The top rail will have slots of the size of wooden inserts and spaced so that the top railing goes into these slots easily. The top railing is to be fixed to the verticals with help of cleats. This will ensure that the top rail does not move and the usable portion of top rail does not have any protruding bolts.
After the screws have been firmly fixed up they will need to be protected with silicone sealants.


 Outdoor Glider Furniture
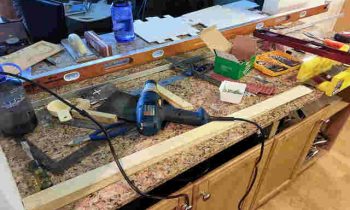 Home Remodeling Tools
 How to Plan and Estimate
 Laminate Flooring for Remodeling
 Reduce Home Remodeling Stress